-
未登录
热门文章
各位同学大家好,我们又见面了。在前面的一些小节中,我们已经学习了 Spring 的基本使用,包括概念解释,IOC 容器使用,AOP 面向切面编程。那么本小节,我们要学习哪些新知识呢?是有关 Spring 对于事务的操作相关知识。
xx解释:
在我们之前的案例中,我们实现了对数据库的数据做增删改查,但是使用的类是 QueryRunner ,它是属于 DbUtils 中的一个操作数据库的工具类,是 Jdbc 技术中的范围。而 Jdbc 属于最底层的接口,是一个规范,定义了 Java 操作数据库必须实现的硬性要求。它虽然能满足项目的开发需求,但是它有以下弊端:
那么如何优雅地解决呢?有请我们的主角登场…JdbcTemplate ,也是本小节我们重点学习的内容。
概念解释:
JdbcTemplate 是 Spring 框架提供的一个类,对 Spring Jdbc 接口做了实现,负责处理资源的建立和释放,对于开发人员来说只需要提供 SQL 语句,使 JDBC 更加易于使用。
使用方式:
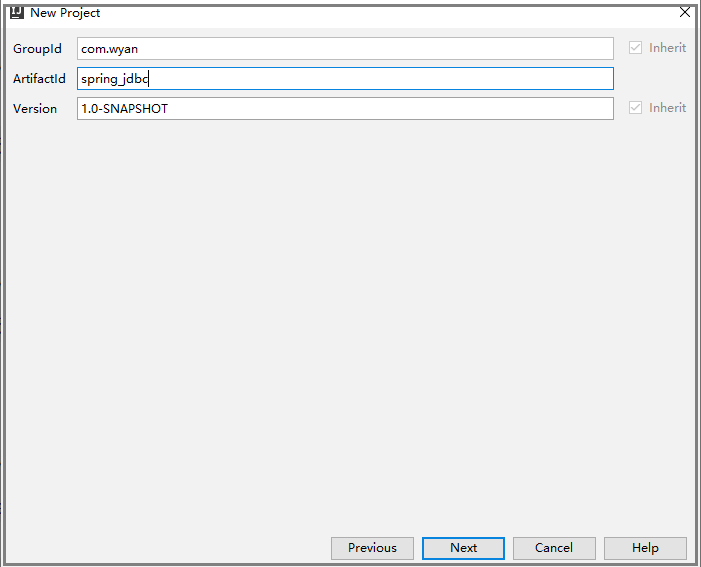
1. 创建工程
2. 引入依赖
<dependencies>
        <dependency>
            <groupId>org.springframework</groupId>
            <artifactId>spring-context</artifactId>
            <version>5.0.2.RELEASE</version>
        </dependency>
		<!-- Spring jdbc 使用的依赖-->
        <dependency>
            <groupId>org.springframework</groupId>
            <artifactId>spring-jdbc</artifactId>
            <version>5.0.2.RELEASE</version>
        </dependency>

        <dependency>
            <groupId>org.springframework</groupId>
            <artifactId>spring-tx</artifactId>
            <version>5.0.2.RELEASE</version>
        </dependency>

        <dependency>
            <groupId>mysql</groupId>
            <artifactId>mysql-connector-java</artifactId>
            <version>5.1.6</version>
        </dependency>
    </dependencies>
3. 准备代码
实体类代码
/** * 账户的实体类 */
public class Account implements Serializable {
    //数据id
    private Integer id;
    //账号编码
    private String accountNum;
    //账号金额
    private Float money;
}
接口代码
/** * 账户的持久层接口 */
public interface IAccountDao {

    /** * 根据Id查询账户 * @param accountId * @return */
    Account findAccountById(Integer accountId);

    /** * 保存账户 * @param account */
    void saveAccount(Account account);

    /** * 更新账户 * @param account */
    void updateAccount(Account account);


}
实现类代码
/** * 账户的持久层实现类 */
@Repository
public class AccountDaoImpl implements IAccountDao {
    //jdbc模板类属性
    @Autowired
    private JdbcTemplate jdbcTemplate;

    //根据id查找
    public Account findAccountById(Integer accountId) {
        List<Account> accounts = jdbcTemplate.query("select * from account where id = ?",new BeanPropertyRowMapper<Account>(Account.class),accountId);
        return accounts.isEmpty()?null:accounts.get(0);
    }

    public void saveAccount(Account account) {
        jdbcTemplate.update("insert into account values(?,?,?)",
                account.getId(),account.getAccountNum(),account.getMoney());
    }

    public void updateAccount(Account account) {
        jdbcTemplate.update("update account set accountnum=?,money=? where id=?",account.getAccountNum(),account.getMoney(),account.getId());
    }
}
4. 配置文件
	<!--配置JdbcTemplate-->
    <bean id="jdbcTemplate" class="org.springframework.jdbc.core.JdbcTemplate">
        <property name="dataSource" ref="dataSource"></property>
    </bean>

    <!-- 配置数据源-->
    <bean id="dataSource" class="org.springframework.jdbc.datasource.DriverManagerDataSource">
        <property name="driverClassName" value="com.mysql.jdbc.Driver"></property>
        <property name="url" value="jdbc:mysql:///transmoney"></property>
        <property name="username" value="root"></property>
        <property name="password" value="root"></property>
    </bean>
	<!--路径扫描-->
    <context:component-scan base-package="com.offcn.dao"></context:component-scan>
5. 测试代码
/** * 测试数据的查询和修改 */
public class JdbcTemplateTest {

    public static void main(String[] args) {
        //1.获取容器
        ApplicationContext ac = new ClassPathXmlApplicationContext("applicationContext.xml");
        //2.获取对象
        IAccountDao accountDao = ac.getBean(IAccountDao.class);
        Account account = accountDao.findAccountById(1);
        System.out.println(account);
        account.setMoney(2000f);
        accountDao.updateAccount(account);
        System.out.println("账号更改成功");
    }
}
6. 测试结果:
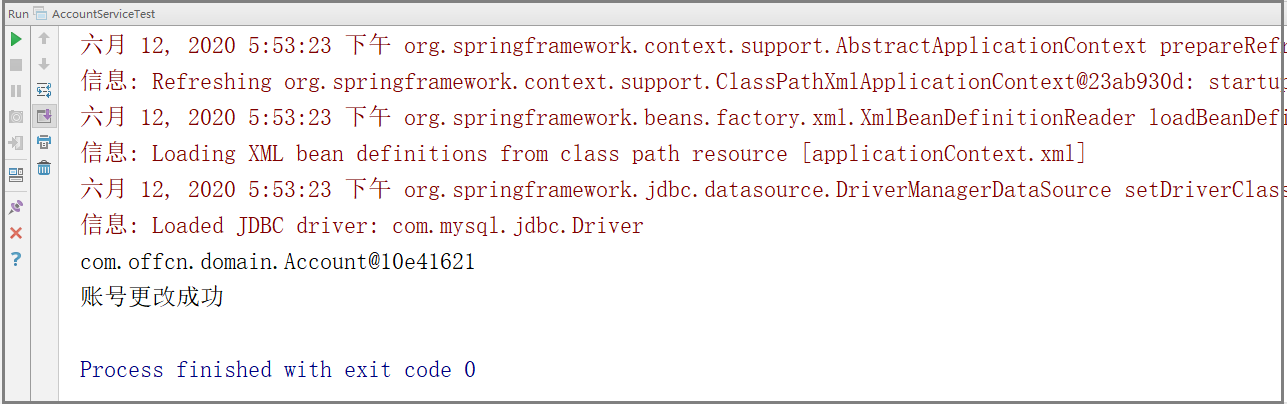
好了,大家。通过上面的案例,我们已经看到了通过 JdbcTemplate 操作数据库的效果了。我们来做一个小的总结哈。
当然:对于事务的控制,本小节并没有体现,只是最为基础的使用。在下个小节的讲解中,我会带你体验 Spring 对事务的控制。本小节先到这里,谢谢大家的关注。
没有比人更高的山… 没有比脚更长的路… 继续加油哦!